


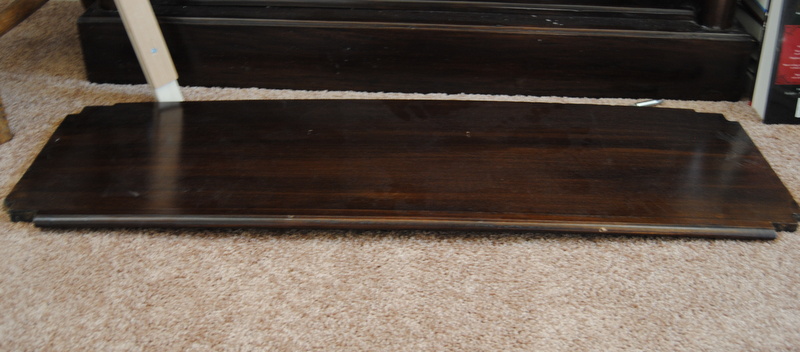
I don't know if you can see the bowing in this top picture as accurately but it was the best one I could find with books on the shelves. It was from about 5 years ago, right after we got it. The picture down below is one of the shelves turned upside down and you can really see how badly it is bowed. It should be lying flat on the ground!
Here are the steps I took to fix my shelf:

****I am going to make this note right here and it goes for all of the pieces you need. Whether you purchase your wood from a Home Depot, Lowes, or other wood supply store, if YOU do NOT have a saw at home, just ask them to cut the pieces to the length you need. They are SUPER nice and willing to help like that! Just bring your measurements with you! Make sure to measure at least 2x's to get it right!
1. I measured underneath each shelf from side to side, inside the framing and purchased 1" X 2" boards that would be the supports on the inside, back of the bookcase, underneath the shelf. As you can see, I also had to purchase 1/4" X 2" piece of wood also that is a little shorter than the 1" X 2" because of the way the framing is, otherwise there would have been a 1/4" gap between the back and my support piece of wood. You may or may not need this additional piece.
a. If you DO need this piece, mark on your 1" X 2" the left and right sides of the framing that are vertical so you know where to attach the 1/4" piece. For example, on my bottom shelf, the left side vertical piece was 2 1/4" in but the right side was only 2". I marked those lines so I could glue and attach my wood right there. Once it was dried, the piece fit into the back perfectly!
b. Once your sides are marked, (I would also mark L and R just to keep them straight, and mark both pieces of wood for which shelf they belong to) apply wood glue to the 2" part of one of the pieces of wood and put the two together. (Make sure the 1/4" is on the back side with L on the left side and R on the right side!)
c. Then you will C-clamp the pieces tightly together using a piece of cardboard or something similar to protect the wood from indentations.
d. Once C-clamped, screw together using FLAT head, 1/2", wood screws. Let it sit overnight or several hours until the glue is nice and set, then move on to the next one.

2. For this step, you will want a nice firm 1" X 2" pine or hard wood. Something that should be very stable for it. This one does not have to be the exact length of the shelf. Mine was about 2" short of the entire shelf length.
I took the piece I made in step one, and one of the pieces of Pine I had cut and on the BACK, UNDER side, I lined this up to match the indents of the shelf with the PINE piece in the FRONT. It should be about 1" short on either side of the piece from Step 1.
a. Put wood glue (in small dabs) on the 1" side (facing the shelf) of the PINE piece and put back in place.
b. Put your cardboard piece on the top part of the shelf (the part touching the ground) and start attaching the C-clamp just to the PINE piece while making sure to keep everything lined up. The wood piece from step 1 should remain flush with the shelf at all times or you will need to readjust. If you let it dry overlapping the edge, it will not fit into the bookcase.

c. Once you have the first side C-clamped, C-clamp the second side and you will start to see the curving straighten out.
d. Wipe off any glue that got smeared or squished out and remove the piece from Step 1.

3. Turn the shelf over and measure how far from the end your piece of wood is now glued. For example: my Step 1 piece brought my Step 2 piece out 1 1/4". If I measure between 1 1/2" and 1 3/4" in, my screw will be attached great. Do the same from the side end and mark where they cross.
b. Once you have both ends marked, measure the distance between those 2 marks and divide it by 3. Mine came out to 11 inches, so I marked the 2 middles screws 11" from the 1st and last screws, 1 1/2" from the back end. Screw these in with 1 1/4" FLAT head, wood screws.
c. Again, let this set over night or several hours until the wood is good and dry!


4. This step has 2 options. If you don't care about appearances on the front, don't follow this part. If you don't care about appearances on the back, follow this step! Take your Step 1 piece to the bookshelf and fit it to the framing. Turn it sideways so you can see the screws and the back of the bookshelf. Mark 4 spots (similar to Step 2) where you can screw all 3 pieces through the back. Approximately 2" from the L side and R side, and then 2 evenly in the middle. Just make sure you will not be hitting the screws in the board of Step 1. (this is why you are turning it sideways). Once marked, drill a small pilot hole through the back of the bookshelf.
5. Once you have screwed the Step 2 piece to the shelf, you can put the Step 1 piece back into the bookcase framing. Line it up with the side framing where the shelf will go. It doesn't have to be perfect yet!
6. Once you have completed Step 3 and your shelf is dry, and you have completed Step 5, place the shelf back onto it's support frame with the new one in place. Once it is in there, look underneath. If your Step 1 piece is not flush with the bottom of the Step 2 piece, either take a scrap piece of wood or a hammer and GENTLY tap it into place.
b. Do this with all of the shelves.
7. Move the bookcase out so you can screw your finishing screws into the backside. You will use 1 1/2" FLAT head, wood screws for this. Just line them up with the pilot holes you already drilled and you are set. Sorry that I am messing up the back of your shelf but they are usually against a wall, right? You can always cover them with the little plastic covers if you want.
a. Second option if you do not want to go through the back, just go ahead and drill your 4 support screws through the front side, going through the PINE wood first. Again, you can always cover with the plastic screw covers or the wood plugs.

8. Finally, find a stain that matches your shelf color and stain away. I just used a little foam brush and it worked great. The front side required about 3 coats, but it dried really quickly.


It was kind of a long process because I only had 2 C-clamps, but I definitely think it was worth it! My shelves are perfectly lined up and my books actually go straight across now!
~Stacy~


0 comments:
Post a Comment