Showing posts with label Tips and Tricks. Show all posts

Friday, July 18, 2014

Oxi Clean to the Rescue

  I know this seems like a strange thing to comment on, but I am finding more and more people who have NEVER tried Oxi Clean for the clothes or other purposes yet.  I thought I would share this now because I have a new baby now and quite frankly, babies are messy and are pros at staining clothes.  This is my first and probably only girl so of course I want to get the most out of the cute clothes she has.  Oxi Clean has been AMAZING, not just on her stuff, but all of our clothes.


   I first started using it about 6 years ago.  I purchased my first container of powder to help with stains we had in our carpet.  I worked SO WELL, I bought the spray to try on laundry.  I first tried it on a blood stain I had gotten while at work (I am a nurse).  It fascinated me when it bubbled up on the blood which vanished almost immediately.  I could literally see it working.  I started using it on every stain I could see and also threw in some with every load of laundry (I use about 1/4 scoop each time).  We moved to Alabama which has red, horribly staining dirt.  I could not get it out with anything else, but it came out with Oxi Clean every time.  Now with my beautiful baby girl, it has saved so many outfits, I can't even count it.
   We were out of town for almost 2 weeks and I forgot to bring any spray with me so her clothes and stains sat there for many days. I even washed them along the way using things like Shout or Zout that were available. The stains did not come out with those.  When we got home, I sprayed all of the clothes and let them sit for about 30 minutes and threw them into the wash.  I was nervous that the stains would not come out since they had sat for so long and had already been washed and dried, but EVERY SINGLE stain came out.  I just had to share it.  
    It has also worked on the stains I have always had trouble getting out: chocolate, pizza sauce, grape juice. It has worked for all of them.  If you haven't tried it already, take a small challenge and buy a bottle of the
spray or a container of the powder and just see how it goes.  You can often find coupons to help save money on it!  You can also find it in many of the laundry detergents now too!  Hope you love it like I have!
~Stacy~

Monday, March 31, 2014

General Conference Ideas for Kids

   I had an idea last April to try to help my kids stay tuned in to our church's General Conference that is held every April and October.  Here we get to listen to all of our church's leaders as a congregation throughout the world.  It is actually pretty cool as an adult, but it is hard to pay attention as a kid.  I know because I was there as a kid myself.  It was really hard to listen to them even though they were telling us all kinds of important information.  They always have good stories that help bring the concepts home, but if you can't concentrate long enough to hear the story, it doesn't do much good, right?
   I have tried using the activity sheets that can usually be found around April and October that basically have this same concept, however, they don't really hold my children's attention for long.  They might listen to 1 talk or 2 and then they are done.  That makes it difficult for the parents to be able to listen to much more either.  Anyhow, I tried my idea this time and it worked AWESOME!!!  They stayed in the living room with me the entire conference and were actually paying attention.  For those who do not know what this is, it is 4 segments, 2 hours each, in which our highest leaders talk to all of the members of our church.  It is held on one Saturday (2 sessions) and Sunday (2 sessions).  We were only able to watch the Sunday sessions because of games and stuff, but that is still 4 hours of attention from a 9 and 6 year old!
  So, all that I did was have the kids go shopping with me to pick out 7 treats.  We got things like M&M's, Jelly beans, Smarties, Jolly Ranchers, Rolo's, Skittles, and Gummy Bears.  The important thing was to get things they enjoy, or it kind of defeats the purpose.  Once at home, we picked out 7 jars to put the candies in, and picked 7 words we thought the speakers would use frequently during the conference.  I gave some suggestions, but the kids came up with most of them.  I will list the ones we used and a few other suggestions to choose from that I actually did hear a lot this time.

Prophet
Holy Ghost
Temples
Jesus Christ
Heavenly Father
Joseph Smith
Prayer
Testimony
Rejoice
Eternal
Mission (Missionary)
Tithing
Priesthood
Pioneer
Baptism
Sacrament
Faith
Savior
The Lord

   What you do is have the kids pick out a candy from the jar whenever they hear that particular word.  For the littler things like Skittles and Jelly Beans, I let them choose 2 or 3, but everything else, just 1.  I would also suggest having the smaller candies for the words you think they will use the very most.  They will get less of a sugar rush but to them, it will still feel like a lot because the get to choose 2 or 3!  It worked out great.  They got to a point they were tired of candy so they each went in the kitchen and got a sandwich bag and started putting the candy in there to save for later, but they didn't stop listening to the talks.  I was really happy and really impressed with how well it worked!  Hope it will work well for your family too!

Here is what ours looked like!

~Stacy~

Friday, March 7, 2014

Chalk Paint Refinishes

    Over the summer, while visiting my sister-in-law, I was introduced to the art of chalk paint refinishes.  My sister-in-law had done several pieces in her home and they were simply gorgeous!  She walked my through the steps and encouraged me to give it a try.  We visited a shop there that specializes in refinishing furniture for people and selling pieces.  The cost difference in purchasing a finished product and finishing your own is at least 4X's less DIY.  It is a little time consuming, but definitely worth every minute.

   My oldest son had this small dresser that was my husband's when he was a kid.  My son liked it but asked if we could paint it blue.  We found the perfect color at the shop in Colorado and purchased the other supplies needed.

The items you'll need are:

  • Chalk Paint (Annie Sloan is the brand we used.  It is about $40 a quart, but it goes a long way.  There are also several tutorials on making your own if you google it, but I haven't tried this so can't give any tips!)
  • Light or Dark soft wax (depends on the finish you are wanting.  You can purchase a dark Finishing Wax from Home Depot or Lowe's for about $10.00.  The light wax can be found from any Annie Sloan distributors.)


  • A large stippling brush
  • Regular size paint brush
  • Small paint brush
  • Cheese cloth
  • Acrylic Paint
  • Petroleum Jelly
  • Fine sand paper
  • Something to refinish


Here is the dresser my son wanted to have painted blue.  It has nice markings on the drawers and lots of scratches and dings to give it lots of character.


1.  Remove all of the hardware.

2.  This next step can just be skipped if you like the wood color and that is the color you want exposed.  If you would like a lighter or darker choose an acrylic paint to suit your taste.  Use a smaller paint brush to apply the acrylic paint to anywhere you think you might want to expose off after the chalk paint is applied.  Good places would be the edges, gouges and scratches, and carvings.  Remember, just because you put the acrylic paint there, it doesn't mean you will be exposing all of it, only some will come through with the sanding.  You will want to apply 2-3 coats of the acrylic paint to make sure it is covered well enough.


3.  After you have all of the acrylic paint on, use the petroleum jelly and apply a layer on each area you want exposed.  You don't want this very think but thick enough that it will allow the chalk  paint to come off.  If you put it on too thick, it will strip much more of the chalk paint than you want off. 


4.  Apply a layer of the chalk paint.  Let the paint dry and then apply a second coat.  Let it set for about 12-24 hours.


5.  Once the paint is completely dry, use your sand paper to remove some of the paint distressing it a bit.  You will be able to see glossy areas where the vaseline areas are.  Focus the sand paper on these to show the color underneath.  Expose as much or as little as you like, just don't make it uniform.

6.  Once everything is exposed you want, use your stippling brush to apply the soft wax back and forth over the painted areas until everything is covered.  Let it sit for about 30 minutes then use about 12 inches of the cheese cloth to rub the wax until smooth.  Apply a second coat of the wax and repeat with the cheese cloth.

7.  Reapply the hardware and display proudly.

~Stacy~


Wednesday, December 4, 2013

More FUN Christmas Decorations


    There are just so many adorable Christmas Decorations out there, it is a shame not to be able to put all of them into one post.  We have just a few of our favorites for this year we wanted to share.

Fabric Trees


   The first one is something our mom made for us a few years back.  They are so cute and can go anywhere so of course they go out every year.  They are really simple and inexpensive to make too.
   For this little project all you need are 2X4's cut about 4 inches long, dowels in 3 different sizes, 3 different colors of fabrics, raffia and a drill and wood glue.

** For the fabric, we would suggest Christmasy colors, but not necessarily Christmas patterned material.  Example, reds, greens, golds, blues.    You can choose solids or something with a mild print like a star or plaid.  If you get about 1/2 yard per color, you should have plenty to cover your tree.

** For the dowels, you really can choose how long you want to cut them (or have them cut when you purchase them if they offer that service--Home Depot or Lowe's would).  Ours are 13", 16" and 19" and that seems to be a perfect length.

1.  You will start by drilling a hole in the center of the 2X4" piece (sitting flat, it will be a 4X4" by 2" height).  Drill it about 1/2 to 3/4" down.  Add a little wood glue and stick your dowel into it.  Allow this to dry.

2.  Next,  cut several strips of the fabric into 1" strips.  The length of these will vary, depending on which tree they are for.  The smaller ones will be about 6-7 inches long, the medium tree 7-8 inches, and the larger tree 8-10 inches.  Cut one strip the length you think will work and actually tie it on to see if that is how long you want it before cutting all of them!

3.  After you have the strips cut into the lengths you desire, start at the bottom of the dowel and just start tying the strips onto the dowel, one by one.  You will want to tie them at different spots (rotating the dowel around) so the loose edges go all around the tree.  Continue until you get to the top.  The final 4-5 pieces you will tie just a little differently.  Lay one or two over the top of the dowel, then tie 2-3 more around the dowel, over the top of the material you just laid down.  This will cover the end of the dowel and finish it off.

4.  Final step is to tie a long raffia ribbon around the top with the long ends touching the ground and maybe +2 inches!


Shop More Sister Stuff!


We have worked really hard this year to get a BUNCH of Christmas decorations into our shop for this season.  We decorate our homes with these fun items and hopefully you will find something you want in your home too!  Some of the things we have available in our shop this year are also linked below and you should be able to see the rest from there!


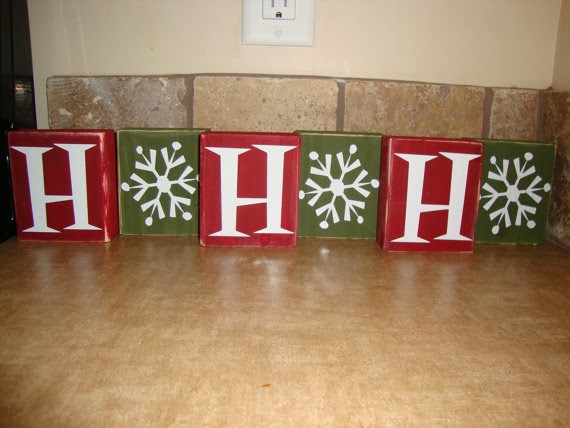
Ho Ho Ho
Merry Christmas


Day 1   Day 2   Day 3   Day 4   Day 6   Day 7   Day 8   Day 9   Day 10   Day 11   Day 12

Monday, December 2, 2013

Christmas Cards


I am one who really likes to make things with my hands, and Christmas cards are one of those things.  If for some weird reason I run out of time during the holidays (wonder why, *wink wink*) I don't send out a card.  I have sent a Walmart photo card twice, but just didn't love the results as much as my homemade ones.  And really, I have absolutely nothing against those. I just love to see something that I have made go out to those that I love.  I am weird, I know.  I thought I would share some of my previous Christmas cards.  All of them were made with Stampin' Up products, the paper, ink and stamps (along with everything else).  This is not sponsored by Stampin' Up, I just stinkin love their stuff!!


Day 1   Day 3   Day 4   Day 5   Day 6   Day 7   Day 8   Day 9   Day 10   Day 11   Day 12

Saturday, May 11, 2013

How to fix a Bowed Shelf

  Maybe this is a weird thing to post about, I am not sure, but maybe it will be useful to someone else!  I had this shelf I had purchased from a furniture store that I absolutely LOVE.  It is a beautiful cherry wood color, simple but beautifully crafted, at least in my opinion.  It was perfect except that within the first few months of having it with my books on it, the shelves all started to sag.  I don't know if it was just my luck or not because the store had the exact same shelf with lots of heavy books decorating it and they were not sagging, so who knows.  Anyhow, it has been like this for a few years because I was just not completely sure how to fix it, but I knew I wanted to fix it and not throw it away.  So with a little inspiration from my mother-in-law and some help from my friends at the local Home Depot, I have FINALLY been able to fix my shelf and it is working AMAZINGLY well.


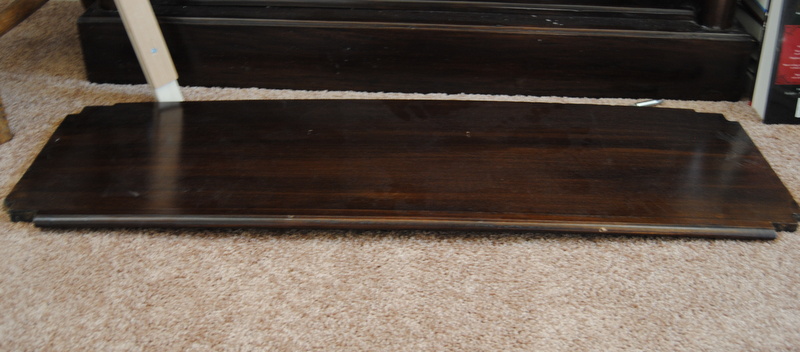
I don't know if you can see the bowing in this top picture as accurately but it was the best one I could find with books on the shelves.  It was from about 5 years ago, right after we got it.  The picture down below is one of the shelves turned upside down and you can really see how badly it is bowed.  It should be lying flat on the ground!


Here are the steps I took to fix my shelf:


****I am going to make this note right here and it goes for all of the pieces you need.  Whether you purchase your wood from a Home Depot, Lowes, or other wood supply store, if YOU do NOT have a saw at home, just ask them to cut the pieces to the length you need.  They are SUPER nice and willing to help like that!  Just bring your measurements with you!  Make sure to measure at least 2x's to get it right!

1.  I measured underneath each shelf from side to side, inside the framing and purchased 1" X 2" boards that would be the supports on the inside, back of the bookcase, underneath the shelf.  As you can see, I also had to purchase 1/4" X 2" piece of wood also that is a little shorter than the 1" X 2" because of the way the framing is, otherwise there would have been a 1/4" gap between the back and my support piece of wood.  You may or may not need this additional piece.  
  a.  If you DO need this piece, mark on your 1" X 2" the left and right sides of the framing that are vertical so you know where to attach the 1/4" piece.  For example, on my bottom shelf, the left side vertical piece was 2 1/4" in but the right side was only 2".  I marked those lines so I could glue and attach my wood right there.  Once it was dried, the piece fit into the back perfectly!
    b.  Once your sides are marked, (I would also mark L and R just to keep them straight, and mark both pieces of wood for which shelf they belong to) apply wood glue to the 2" part of one of the pieces of wood and put the two together.  (Make sure the 1/4" is on the back side with L on the left side and R on the right side!)  
     c.  Then you will C-clamp the pieces tightly together using a piece of cardboard or something similar to protect the wood from indentations.  
      d.  Once C-clamped, screw together using FLAT head, 1/2", wood screws.  Let it sit overnight or several hours until the glue is nice and set, then move on to the next one.


2.  For this step, you will want a nice firm 1" X 2" pine or hard wood.  Something that should be very stable for it.  This one does not have to be the exact length of the shelf. Mine was about 2" short of the entire shelf length.  
I took the piece I made in step one, and one of the pieces of Pine I had cut and on the BACK, UNDER side, I lined this up to match the indents of the shelf with the PINE piece in the FRONT.  It should be about  1" short on either side of the piece from Step 1.  
   a.  Put wood glue (in small dabs) on the 1" side (facing the shelf) of the PINE piece and put back in place.
   b.  Put your cardboard piece on the top part of the shelf (the part touching the ground) and start attaching the C-clamp just to the PINE piece while making sure to keep everything lined up.  The wood piece from step 1 should remain flush with the shelf at all times or you will need to readjust.  If you let it dry overlapping the edge, it will not fit into the bookcase.


   c.  Once you have the first side C-clamped, C-clamp the second side and you will start to see the curving straighten out.  
d.  Wipe off any glue that got smeared or squished out and remove the piece from Step 1.


3.  Turn the shelf over and measure how far from the end your piece of wood is now glued.  For example: my Step 1 piece brought my Step 2 piece out 1 1/4".  If I measure between 1 1/2" and 1 3/4" in, my screw will be attached great.  Do the same from the side end and mark where they cross.
b.  Once you have both ends marked, measure the distance between those 2 marks and divide it by 3.  Mine came out to 11 inches, so I marked the 2 middles screws 11" from the 1st and last screws, 1 1/2" from the back end.  Screw these in with 1 1/4" FLAT head, wood screws.
c.  Again, let this set over night or several hours until the wood is good and dry!


4.  This step has 2 options.  If you don't care about appearances on the front, don't follow this part.  If you don't care about appearances on the back, follow this step!  Take your Step 1 piece to the bookshelf and fit it to the framing.  Turn it sideways so you can see the screws and the back of the bookshelf.  Mark 4 spots (similar to Step 2) where you can screw all 3 pieces through the back.  Approximately 2" from the L side and R side, and then 2 evenly in the middle.  Just make sure you will not be hitting the screws in the board of Step 1.  (this is why you are turning it sideways).  Once marked, drill a small pilot hole through the back of the bookshelf.

5.  Once you have screwed the Step 2 piece to the shelf, you can put the Step 1 piece back into the bookcase framing.  Line it up with the side framing where the shelf will go.  It doesn't have to be perfect yet!

6.  Once you have completed Step 3 and your shelf is dry, and you have completed Step 5, place the shelf back onto it's support frame with the new one in place.  Once it is in there, look underneath.  If your Step 1 piece is not flush with the bottom of the Step 2 piece, either take a scrap piece of wood or a hammer and GENTLY tap it into place.
b.  Do this with all of the shelves.

7.  Move the bookcase out so you can screw your finishing screws into the backside.  You will use 1 1/2" FLAT head, wood screws for this.  Just line them up with the pilot holes you already drilled and you are set. Sorry that I am messing up the back of your shelf but they are usually against a wall, right?  You can always cover them with the little plastic covers if you want.
a.  Second option if you do not want to go through the back, just go ahead and drill your 4 support screws through the front side, going through the PINE wood first.  Again, you can always cover with the plastic screw covers or the wood plugs.


8.  Finally, find a stain that matches your shelf color and stain away.  I just used a little foam brush and it worked great.  The front side required about 3 coats, but it dried really quickly.


  It was kind of a long process because I only had 2 C-clamps, but I definitely think it was worth it!  My shelves are perfectly lined up and my books actually go straight across now!

~Stacy~


Thursday, September 27, 2012

The Husband Whisperer

So, if I haven't already told you, I loved BYU-I education week.  I went to so many great classes that I really love and learned so much from.  One class that I was really looking forward to was "The Husband Whisperer."  I loved the name, and thought I can always use tips on how to get my husband to do what I want him to do. :)  Kevin Hinckley was the instructor, this is his website. 
To begin with he taught us, that we, as the Husband Whisperers, need to be gentler and softer, have more emphasis on the relationship, and have longer ropes (just imagine a horse with a metal bit in their mouth and a short rope compared to a long rope, which do they respond better too.)
He shared a scripture in 3 Nephi 11:3-6 in the Book Of Mormon, and I had to laugh!  It reads:

"And it came to pass that while they were conversing one with another, they heard a voice as if it came out of heaven, and they cast their eyes round about, for they understood not the voice which they heard; and it was not a harsh voice, neither was it a loud voice which they heard; ... And it came to pass that again they heard the voice, and they understood it not...And again the third time they did hear the voice, and did open their ears to hear it."
  
Ha!  That could either be your husband or your children. :)  Back to to class....
Kevin taught us that we need to talk to our husbands with gentle tenderness and strength. This means not being wimpy, weak, naggy, or whiny.  Tough, I know.
He had four steps to talking to our husbands so that they will hear us,

Step 1:
Own personal conduct.  
Where do I need to improve.  There are two of us in this relationship, and although sometimes we think it is all the other persons fault, we are both contributing and can both improve.
Step 2:
Spirit to Spirit
1. Use a still small voice.
2. Use physical contact.
3. Use eye contact.
At this point in time he went up to one of the class members, got down on his knee, took her hand and in looked into her eyes.  In a quite voice he said, "Honey, I am really worried about you.  I noticed... I am just wondering what I can do to help you."    He told us you don't have to get down on your knee or take their hand, but talking in a quite, non-nagging voice, touching them (on the shoulder or arm or holding hands, something like that) and looking in their eyes, that is what it takes to get their attention and let them know this is important and I really care.
Step 3:
Empathy
How are you feeling?
How does this effect you?
What are your concerns?

Then really listen to them.  Don't just ask them and then start planning what you, as Super Woman, can do to fix it.  
Step 4:
Planning
What would you like to do?
What would you like me to do?
And KEEP IT SHORT!!

He said that we need to keep these kinds of conversations around 30 -60 seconds.  Our husbands will start out listening to us (especially if we use step 2) but after about 30 seconds they start to tune us out because they think that we are going to go on and on and start nagging.  But if we keep it short they will listen.

Now after this planning he said, what do you envision?  He instructed us to be careful when we are trying to assist our husbands to do things.  We cannot expect him to do it the same way you would expect from yourself.  

This was a great class.  I wish that it would have been an hour longer, I am sure that I would have learned so much more from him.  
FYI.. Kevin Hinckley is a a marriage counselor in Dallas, TX.  He has been doing this for many years, and I think he would be a great counselor.


I wish you luck as you "Whisper" to your husbands.

~Rachel~

Sunday, September 23, 2012

Cheap House Updates Part 2


So for the second edition, I have been working outside and more of the painting inside the house. For the outside, the cheap update I'll show you is how to spruce up your flower beds and bring life to your front (and/or back) yard.
 I know my yard looks terrible right now.  I have not weeded in a while, but you get to see the good, the bad, and THE UGLY!!
 These are just close ups of each of the flowerbeds. 

 These flowers were beautiful this summer, but their time has come to be pulled!  I spent about 3 hours weeding, and then planting pansies, and pink mums one day. . .
 
 Today,  my son and I spent another 2 hours spreading mulch on all of the beds.

                Before                                                                After
 
                 Before                                                              After

                     Before                                                                After
     

               Before                                                            After
 

 This one looks so much better huh!  For this project, I spent about $50.00 on the mulch ($2.56/ bag at Walmart) and $20.00 on flowers.  I love the way it looks with fresh mulch!  I just pops the colors of the flowers and green bushes out.
 

Here is a VERY cheap thing for your front door!  This flower pot was only $16.00!
 
Same $16.00 flower pot, just at the side of the garage to add a little visual interest there too!
 
 
My kitchen will be the next big painting project.  Here is the before picture:
You can definitely see the plaster touch-ups I have made already, but no worries, I will be painting over them soon!  Just in case you are wondering, I will be painting my kitchen Glidden's- Gentle Fawn.  Here is a link to look at it at Home Depot: http://www.homedepot.com/Paint/h_d1/N-5yc1vZar2d/Ntt-Gentle%2520Fawn/searchNav-true/h_d2/Navigation?keyword=Gentle%20Fawn&Ns=None&Ntpr=1&Ntpc=1&selectedCatgry=Paint&omni=Paint&langId=-1&storeId=10051&catalogId=10053.  It is a warm brown with an orange undertone.  You can get samples at Home Depot and Walmart for $2.94 of it premixed to test it on your walls.
 I think it is beautiful and goes well with the counter tops, cupboards and even brings out colors in the floor!  I will wait for opinions once it is done.  It is a little bit of a slow process because there is so much to go around!
Yay!  My kitchen is finally done!  Here is the final color. . . any thoughts?
 
 ~Stacy~
Related Posts Plugin for WordPress, Blogger...